5 Ways To Putt
Eighty-five percent of the information people take in is visual. That is,what we see is most of what we know. Consider the last movie you saw. I bet you remember more of what you saw than the dialogue you heard. The same goes for golf. What you see on the golf course is often what you get. (If you’ve ever fixated on a water hazard only to hit your ball in it, you know what I mean.)
Because our images are so important, it’s vital that we have positive ones. I’ll show you how to apply “visualization” techniques to your putting. I’ll identify the five different ways people putt and tell you what they see and how they practice (even if one method shouldn’t be emulated).
I’m sure you’ll recognize your putting method in these photos, and I suggest, if you’re not satisfied with your current routine, to work your way up to the most successful type of putter.What type of putter is that, you ask? Read on to find out.
What He Sees
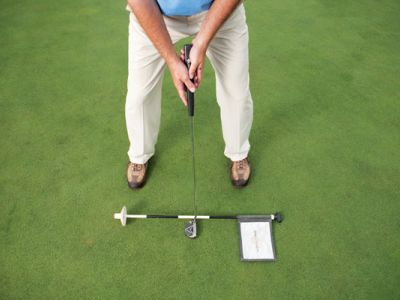
The only thing that the “mechanical putter” sees when he putts is his stroke: whether it arcs or moves straight back and through, and if it accelerates or decelerates. Because he’s a purely technical putter, he’s unaware of his target and loses all sense of distance, direction and speed. For these reasons, he’s the least successful putter of the group.
1.The Mechanical Putter: How To Practice It
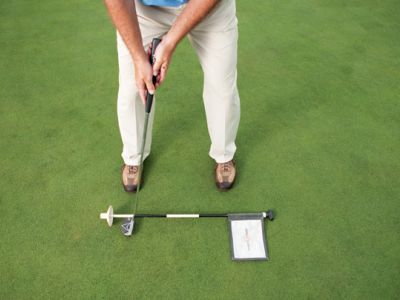
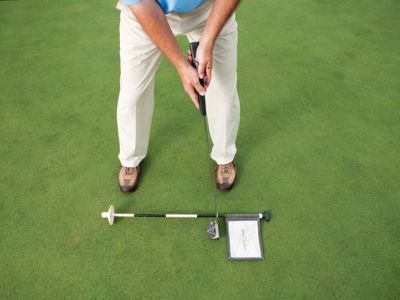
Because the mechanical putter is “stroke-focused,” he likes to use either a training aid to help him groove an arcing, on-plane stroke, or a flag stick (shown here) to ensure his stroke stays straight. I don’t recommend you practice like this or become a mechanical putter, because it makes you ignore your putt’s distance, speed and direction. (Speed is the most important part of putting.) If you’re a mechanical putter, I suggest you stop putting this way and read on! There’s a lot to learn from the other four types of putters.
How To Practice It
2.The Spot Putter
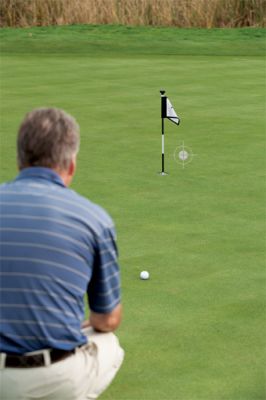
When the “spot putter” reads his putt, he identifies a spot (a spike mark, discoloration of the green or old ball mark) and hits his ball toward it. Spot putters tend to be nonvisual in nature and use the spot to determine how far and in what direction they should putt the ball.
(Note here that I’m aiming at a spot just beyond the hole. That not only gives me an aiming point, but, because it’s beyond the hole, also gives me pretty decent speed. After all, I don’t want to leave any putt short.) The better my visual image of the spot as I stroke the putt, the better my speed will be.
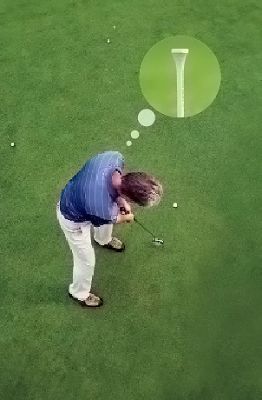
Place three tees at three different distances from you. (It may be hard to see in the picture at right, but I’ve placed them 10, 20 and 30 feet away.) Aim each putt toward a tee. Then, as you make your stroke, picture the corresponding tee in your mind’s eye.
With enough practice, you should “see” the tee (and, hence, remember where and how far away it is) when you look at the ball. This will help you retain your target, and gauge the correct distance, too.
What He Sees
How To Practice
3.The Line-To-Spot Putter
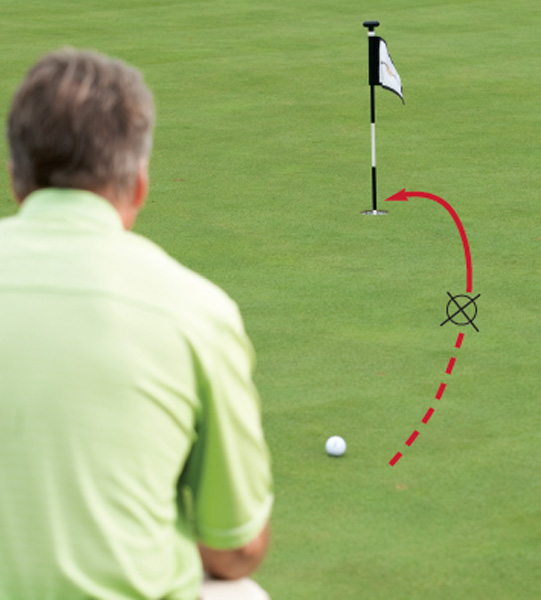
When the “line-to-spot putter” reads his putt from behind the hole, he sees a line going from the ball to the hole. When he stands over the ball, he sees a straight line extending down his target line that ends at a spot where he wants his ball to finish. He holds a picture of the spot as he strokes his putt.
When you read your putt from behind the ball, visually track the line from your ball toward the hole. Then choose an intermediate target on your line four to five inches in front of your ball. Aim the brand’s logo or a line on your ball at that intermediate target.
When you stand over the ball, adjust your setup until it visually appears that the line drawn on your ball goes right through your intermediate target. Visually continue to extend that line to a spot that’s the same distance you want your ball to roll. Adjust the spot accordingly to control your speed for uphill and downhill putts.
What He Sees
How To Practice It

I’ve chosen an intermediate target and aimed my ball at it. Now I rehearse my stroke and visualize the line extending from my ball to the hole.
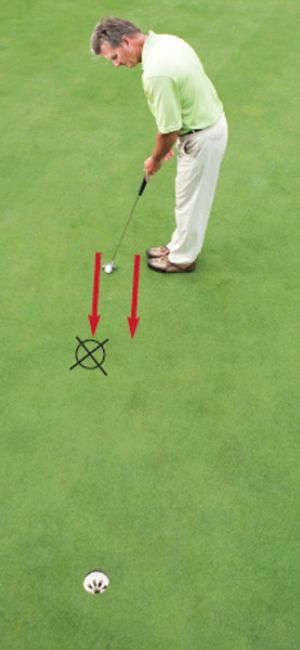
Next I make sure my putter is aimed at the spot and my body is parallel to the target line.
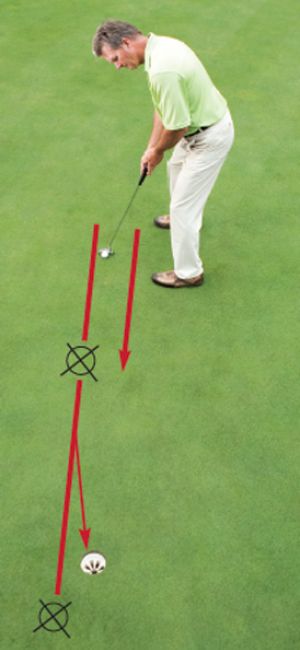
I extend my target line through my intermediate target to a spot just beyond the hole (my putt’s a little uphill). Note how I’m planning for it to break to the left.
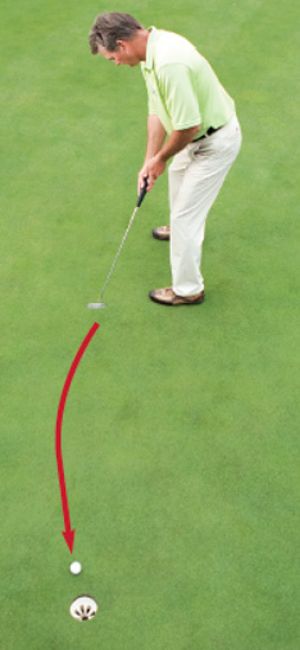
I make a smooth stroke and hold my finish. Note how I haven’t peeked to see where my ball’s heading. This one looks good!
4. The Line Putter
The “line putter” sees the curved line along which his ball will roll from address until it falls in the hole. On a flat putt and during his putting stroke, he has an image—in his mind’s eye—of the ball entering the cup; on a downhill putt, the line ends short of the hole; and on an uphill putt, the line goes through the hole.
Aim your ball’s logo (or the line you’ve drawn on it) at a spot four or five inches in front of your ball that’s on your intended target line. Once you’re satisfied that it’s appropriately lined up, trace a line from your ball through the spot and onward toward the hole.
When you putt, the ball should roll over the spot and follow the imaginary line you’ve created toward the hole. A strong visual image will help control your ball’s speed. Remember, the clearer the picture in your mind’s eye, the better your speed control. Also it’s important to know that your putt will travel the same distance as your last visual focus. Adjust your line for uphill and downhill putts to accommodate your desired speed.
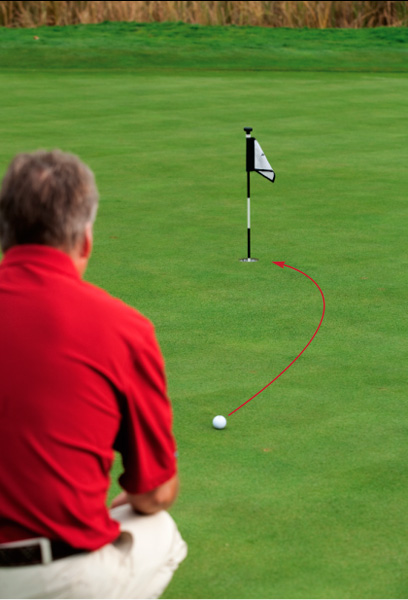
What He Sees
How To Practice It
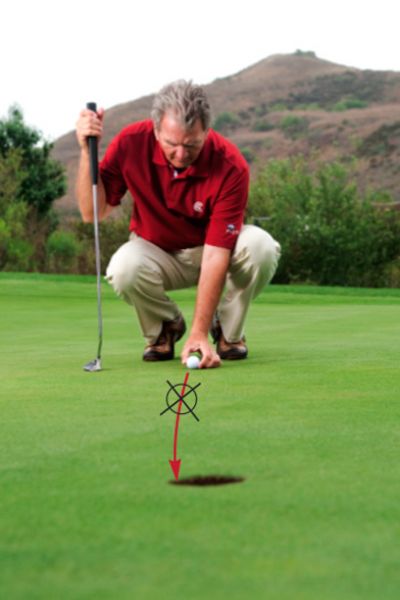
I’ve chosen an intermediate target and aimed my ball at it. Now I rehearse my stroke and visualize the line extending from my ball to the hole.
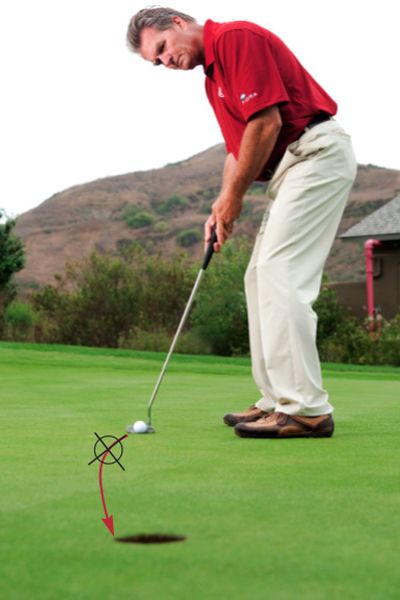
Next I make sure my putter is aimed at the spot and my body is parallel to the target line.
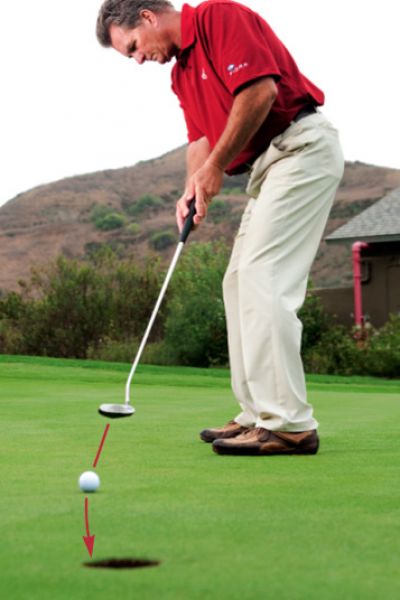
I extend my target line through my intermediate target to a spot just beyond the hole (my putt’s a little uphill). Note how I’m planning for it to break to the left.
5. The Line/Speed Putter
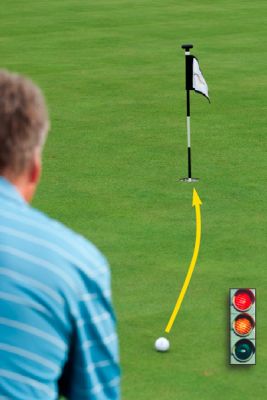
The “line/speed putter” sees the ball travel on a line toward the hole and fall into it at his desired speed. Because of his acute vision and attention to detail, the line/speed putter is the most successful of the five.
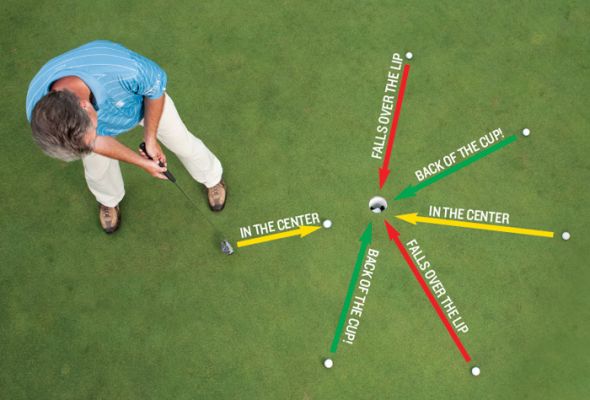
1. Place 8-10 balls in a circle about three feet from the hole. 2. Close your right eye to eliminate unnecessary right-side peripheral vision. (Lefties, do the opposite.) 3. Stroke each ball with a different speed. Some should go in firm, some should just fall over the front edge, while others should be about medium speed.
Note: For putters 2 through 5, your visual focus over the ball should be an image so clear in your mind’s eye,that the ball is a blur. Hold that image as long as you can after the ball leaves the putter face. This will take practice. Also, you’ll have your best success if you start your stroke as soon as your eyes return to the ball. The longer you stand over the ball, the more your image will fade. Your speed control will be off.
What He Sees
How To Practice
6. Bonus Tip: How To Hold An Image
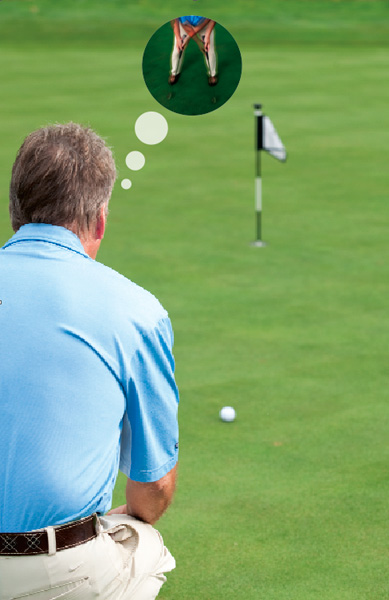
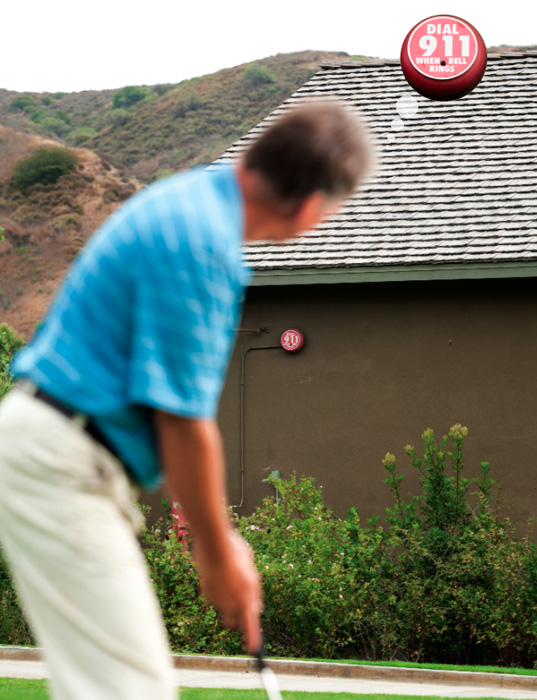
The better you can picture your target (i.e., the hole, spot, a line between your ball and the hole, or the speed of the ball into the hole), the better your putting will be. But you don’t have to be on the putting green, or even have a putter in your hand to train yourself to be more visual. Take a look at the photo. I’m looking at an emergency bell that’s just opposite the driving range at Arroyo Trabuco Golf Club, where I teach. I practice visualization by staring at the bell and keeping its image in my mind and then looking at the ball.
However, when I look at the ball, I don’t see the ball. Rather, I “see” the bell. It’s my target after all, and I want to make my stroke with my target in mind. You can try this anywhere, even in your office. Stare at a door handle, then look at a wall while retaining the door handle’s image. You should be able to see that image for five seconds, and while this might not sound like very long, it takes practice to hold an image for five seconds, to the exclusion of anything else. With enough practice doing this, you’ll have stronger images of your target. (Just don’t do it when your boss is around!)
Dr. David Wright, PGA, teaches at Arroyo Trabuco Golf Club in Mission Viejo, California. To learn more about him and his teaching philosophy, visit wrightbalance.com.
Source - http://www.golftipsmag.com
DRAIN IT - Make more putts with this quick tip
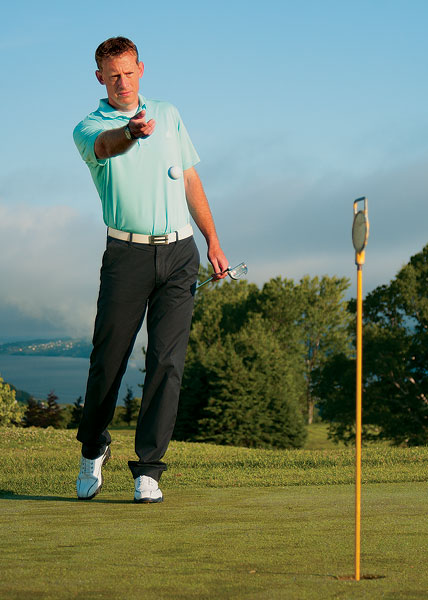
I bet if you stood 10 feet away from me, you could easily toss me a golf ball and wouldn't be short or long with your throw. In fact, I bet you wouldn't think twice about how to do it. You'd subconsciously judge the distance and trust your ability. If it's so easy to toss a ball, why do so many people struggle with putting a golf ball the right distance?
Just like when one throws a ball, putting it the right distance is the result of referencing your past experiences. Putt a lot on greens of varying speeds and slope, and you'll likely be able to gauge the speed correctly. Haven't played in a while, and you may be a bit rusty with your distance control.
While practice may not always make perfect, it certainly helps. Another way to improve your distance control is to think of your putts as "tosses." For example, I like to limit the time between my last look at the hole (or my target) and the ball. As my head returns to the ball, I almost immediately start my stroke. That visual reference must stay fresh in my mind, so I'm reacting to my target, not the ball. It's a bit like how a basketball player shoots a free throw. He doesn't look at the ball, he looks at the back of the rim. He doesn't think about distance, he thinks about making it. And he does that by reacting naturally to his target.
By Wayne Allen, CPGA
Source - http://www.golftipsmag.com


